Quiz app using Javascript
How to create a Quiz App using JavaScript?
- Use HTML to structure the Quiz App.
- Use CSS to style the Quiz App.
- For the functionality of Quiz App use JavaScript.
Source Code of HTML File.
<!DOCTYPE html>
<html lang="en">
<head>
    <meta charset="UTF-8">
    <meta name="viewport" content="width=device-width, initial-scale=1.0">
    <title>Quiz App</title>
    <link rel="stylesheet" href="style.css">
    <script src="script.js" defer></script>
</head>
<body>
    <div class="app">
        <h1>Simple Quiz</h1>
        <div class="quiz">
            <h2 id="question">
                Question goes here
            </h2>
            <div id="answer-buttons">
                <button class="btn">Answer 1</button>
                <button class="btn">Answer 2</button>
                <button class="btn">Answer 3</button>
                <button class="btn">Answer 4</button>
            </div>
            <button id="next-btn">
                Next
            </button>
        </div>
    </div>
</body>
</html>
Explanation
Body section:
This is the stage where all the action happens! It contains the visible elements that users will interact with. Here’s what we see on the stage:
- App container: This div (division) element acts as the main container for the quiz application. It likely has styles applied in the external CSS file to define its appearance (size, position, etc.).
- Quiz title: An h1 heading displays the title “Simple Quiz” in a large and prominent way.
- Quiz section: Another div element, likely styled differently in the CSS, holds the actual quiz content.
- Question: An h2 heading with the ID “question” is where the quiz will display each question. Initially, it says “Question goes here” which will be replaced by actual questions in JavaScript.
- Answer buttons: A div with the ID “answer-buttons” groups four buttons. These buttons, likely styled identically in the CSS class “btn”, will hold the answer choices for each question.
- Next button: A button with the ID “next-btn” displays the text “Next”. JavaScript will likely trigger this button to move on to the next question after a user selects an answer.
Source code of CSS File.
*{
    margin: 0;
    padding: 0;
    box-sizing: border-box;
}
body{
    background: #001e4d;
}
.app{
    width: 90%;
    max-width: 550px;
    background: #fff;
    margin: 100px auto 0;
    border-radius: 10px;
    padding: 30px;
}
.app h1{
    color: #001e4d;
    text-align: center;
    border-bottom: 1px solid #001e4d;
    padding-bottom: 30px;
}
.quiz{
    padding: 20px 0;
}
.quiz h2{
    color: #001e4d;
}
.btn
{
    background: #fff;
    color: #222;
    font-weight: 500;
    width: 100%;
    border: 1px solid #222;
    padding: 10px;
    margin: 10px 0;
    text-align: left;
    border-radius: 5px;
    cursor: pointer;
    transition: all 0.4s;
}
.btn:disabled{
    cursor: no-drop;
}
.btn:hover:not([disabled]){
    background: #222;
    color: #fff;
}
#next-btn{
    background: #001e4d;
    color: #fff;
    font-size: 25px;
    width: 150px;
    padding: 5px;
    margin: 20px auto 0;
    border: 1px solid #222;
    border-radius: 5px;
    cursor: pointer;
    display: none;
}
.correct{
    background: #9aeabc;
}
.incorrect{
    background: #ff9393;
}
Explanation
Building the App’s Box (app class)
- The .app class styles the main container of the quiz application.
- It sets a width of 90% but also has a maximum width of 550px. This ensures the app scales nicely on different screens while maintaining a reasonable size.
- The background is set to white (#fff) to provide a clean contrast with the dark background.
- Margins are applied to position the app nicely within the viewport (100px from the top, centered horizontally, and no margin at the bottom).
- To soften the corners, a border-radius of 10px is applied, giving the app a subtle rounded look.
- Padding of 30px adds some breathing room within the app’s container.
The Quiz Title (.app h1)
- This section styles the quiz title (“Simple Quiz”).
- The text color matches the dark blue background (#001e4d) for good contrast.
- Text alignment is set to center, making the title prominent in the app.
- A thin (1px) solid line separates the title from the quiz content using the same dark blue color.
- Padding adds some space below the title for better readability.
The Quiz Section (.quiz)
- The .quiz class styles the section that holds the actual quiz questions and answers.
- Padding of 20px on top and bottom adds some space around the content.
The Question Itself (.quiz h2)
- This styles the heading element that displays the quiz question.
- The text color again uses dark blue (#001e4d) for consistency.
The Answer Buttons (.btn class)
- This is where the magic happens! The .btn class styles the individual answer buttons.
- They have a white background (#fff) for readability against the dark app background.
- Text color is set to a dark gray (#222) for good contrast.
- A font-weight of 500 gives the buttons a slightly bolder look compared to regular text.
- Each button takes up the full width (100%) of the available space within the app container.
- A solid border (1px) with a dark gray color (#222) adds definition to the buttons.
- Padding of 10px provides enough space for the answer text within the button.
- Margins of 10px on top and bottom create some separation between buttons.
- Text alignment is set to the left to ensure the answer choices are read properly.
- A border-radius of 5px adds a subtle rounded look to the buttons.
- The cursor becomes a pointer when hovering over the button, indicating interactivity.
- A smooth transition effect (transition: all 0.4s) is applied, likely to create a subtle hover effect that changes the button’s background and text color on hover (defined later).
- Disabled buttons are styled with a cursor: no-drop to visually indicate they can’t be interacted with.
Hovering over the Answer Buttons
- This section styles the behavior when hovering over an answer button (.btn:hover:not([disabled])).
- The background color flips to the dark blue (#001e4d) used in the title and body background.
- Text color switches to white (#fff) for high contrast on the new background.
The Next Button (#next-btn)
- This styles the button that likely allows users to move to the next question after selecting an answer.
- It has a dark blue background (#001e4d) to match the title and hover effect of the answer buttons.
- Text color is set to white (#fff) for good contrast.
- Font size is increased to 25px, making it stand out as a call to action button.
- The button has a fixed width of 150px.
Answer Feedback (classes like .correct and .incorrect)
- These classes are likely defined to style the answer buttons differently based on whether the user chose the correct answer or not.
- The .correct class might set a green background color (#9aeabc) to indicate a correct answer.
- The .incorrect class might set a red background color (#ff9393) to indicate a wrong answer.
Conditional Styling (using JavaScript)
- The CSS we’ve seen so far defines styles that are applied all the time. However, the JavaScript code (script.js) interacts with the CSS to show/hide elements or change their styles dynamically.
- For instance, the #next-btn button is currently hidden with display: none;. JavaScript will change this style to display: block; when a user selects an answer, making the “Next” button appear.
Source code of JavaScript file
const questions = [
{
question : "There are ___ levels of heading in HTML",
answers: [
{ text : "Three",correct : false },
{ text : "Four",correct : false },
{ text : "Five",correct : false },
{ text : "Six",correct : true }
]
},
{
question : "The different ways of Creating Graphics for the Web are.",
answers: [
{ text : "Graphics packages",correct : false },
{ text : "Graphics packages, Digital cameras, Scanned photographs",correct : true },
{ text : "Digital cameras",correct : false },
{ text : "None of the above",correct : false }
]
},
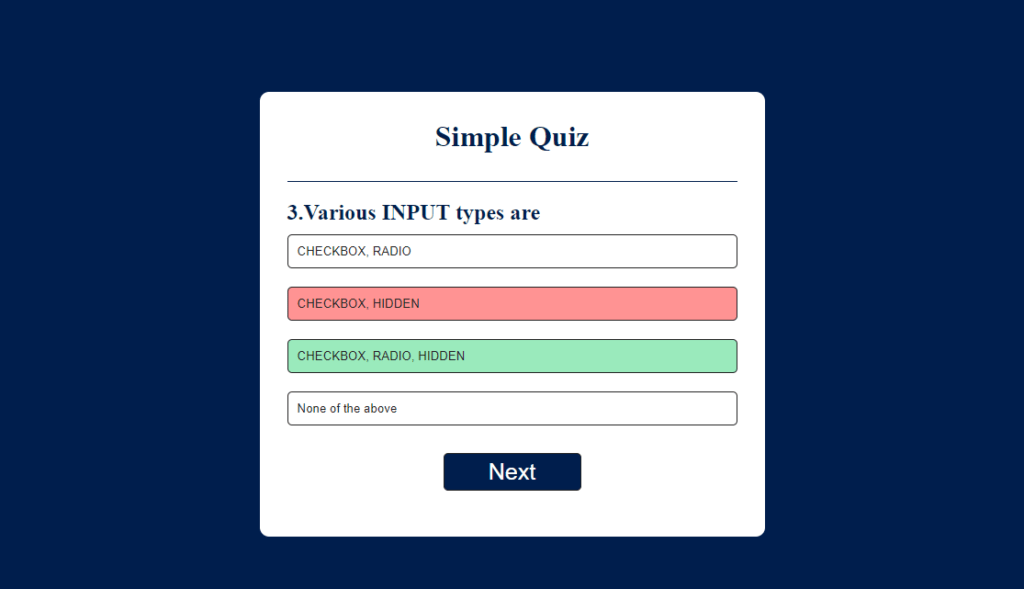
{
question : "Various INPUT types are",
answers: [
{ text : "CHECKBOX, RADIO",correct : false },
{ text : "CHECKBOX, HIDDEN",correct : false },
{ text : "CHECKBOX, RADIO, HIDDEN",correct : true },
{ text : "None of the above",correct : false }
]
},
{
question : " CGI stands for",
answers: [
{ text : "Command Gate Interface",correct : false },
{ text : " Common Gateway Interface",correct : true },
{ text : " Common Gate input",correct : false },
{ text : "None of the above",correct : false }
]
},
{
question : "Which of the following programming languages is commonly used for server-side scripting in web development?",
answers: [
{ text : "PHP",correct : true },
{ text : "JavaScript",correct : false },
{ text : "HTML",correct : false },
{ text : "CSS",correct : false }
]
}
];
const questionElement = document.getElementById("question");
const answerButton = document.getElementById("answer-buttons");
const nextButton = document.getElementById("next-btn");
let currectQuestionIndex = 0;
let Score = 0;
function startQuiz(){
currectQuestionIndex = 0;
Score = 0;
nextButton.innerHTML = "Next";
showQuestion();
}
function showQuestion(){
restState();
let currectQuestion = questions[currectQuestionIndex];
let questionNo = currectQuestionIndex + 1;
questionElement.innerHTML = questionNo + "." + currectQuestion.question;
currectQuestion.answers.forEach(answer =>{
const button = document.createElement("button");
button.innerHTML = answer.text;
button.classList.add("btn");
answerButton.appendChild(button);
if (answer.correct){
button.dataset.correct = answer.correct;
}
button.addEventListener("click" , SelectAnswer);
});
}
function restState(){
nextButton.style.display = "none";
while(answerButton.firstChild){
answerButton.removeChild(answerButton.firstChild);
}
}
function SelectAnswer(e){
const selectBtn = e.target;
const iscorrect = selectBtn.dataset.correct === "true";
if(iscorrect)
{
selectBtn.classList.add("correct");
Score++;
}else{
selectBtn.classList.add("incorrect");
}
Array.from(answerButton.children).forEach(button =>{
if(button.dataset.correct === "true"){
button.classList.add("correct");
}
button.disabled = true;
});
nextButton.style.display = "block";
}
function showScore(){
restState();
questionElement.innerHTML = `You Scored ${Score} Out of ${questions.length}`;
nextButton.innerHTML = "Play Again";
nextButton.style.display = "block";
}
function handleNextButton(){
currectQuestionIndex++;
if(currectQuestionIndex < questions.length){
showQuestion();
}else{
showScore();
}
}
nextButton.addEventListener("click" , () =>{
if(currectQuestionIndex < questions.length){
handleNextButton();
}else{
startQuiz();
}
});
startQuiz();
Explanation
Data Setup (const variables)
- The code starts by defining an array of constants (questions). This array holds the actual quiz content, with each question as an object.
- Each question object has two properties:
- question: This is the actual question text that will be displayed.
- answers: This is an array of objects, each representing an answer choice.
- Each answer object has two properties:
- text: This is the text displayed for the answer choice.
- correct: This is a boolean value (true or false) indicating if the answer is correct.
Other constants are defined to reference HTML elements: - questionElement: This refers to the h2 element with the ID “question” where the actual question text will be displayed.
- answerButton: This refers to the div element with the ID “answer-buttons” that will hold the answer buttons.
- nextButton: This refers to the button element with the ID “next-btn” that controls moving to the next question.
Two more variables are declared: - currectQuestionIndex: This variable keeps track of the index of the current question being displayed (starts at 0).
- Score: This variable stores the user’s current score (starts at 0).
Starting the Quiz (startQuiz function)
- The startQuiz function is called when the quiz needs to begin (or restart).
- It resets currectQuestionIndex and Score to their initial values.
- It sets the text of the “Next” button back to “Next”.
- Finally, it calls the showQuestion function to display the first question.
Displaying the Current Question (showQuestion function)
- The showQuestion function displays the current question and answer choices.
- It first calls the restState function to clear any previous answer styles and buttons.
- showQuestion function retrieves the current question object from the questions array based on the currectQuestionIndex.
- It constructs the question number by adding 1 to currectQuestionIndex and formats the question text with the question number.
- It iterates through the answers array of the current question using forEach.
- Inside the loop, it creates a new button element (button).
- The button’s text content is set to the current answer’s text (answer.text).
- This button is assigned the “btn” class for styling (defined in CSS).
- The button is appended to the answerButton element, adding it to the list of answer choices displayed on the screen.
- If the current answer is the correct one (answer.correct is true), a data attribute named correct is set to “true” on the button element. This will be used later to identify the correct answer.
- Finally, an event listener is added to the button using addEventListener. When the button is clicked, it calls the SelectAnswer function, passing the click event object as an argument.
Clearing the Quiz State (restState function)
- The restState function is used to clear the quiz state after displaying a question or before displaying a new one.
- It hides the “Next” button by setting its display style to “none”.
- It removes any existing answer buttons by looping through the answerButton element’s children and removing them one by one.
Handling Answer Selection (SelectAnswer function)
- The SelectAnswer function is called whenever a user clicks on an answer button. It receives the click event object (e) as an argument.
- It retrieves the clicked button element (selectBtn) from the event object.
- It checks if the clicked button has the data-correct attribute set to “true” using a comparison with “=== true” (strict comparison). This tells us if the clicked button represents the correct answer.
- If the answer is correct (iscorrect is true):
- The button’s class list is modified to add the “correct” class, likely applying a green background color from the CSS (as discussed earlier).
- The score is incremented by 1.
If the answer is incorrect: - The button’s class list is modified to add the “incorrect” class, likely applying a red background color from the CSS.
- It then iterates through all the child buttons (answerButton.children) of the `answer.
Disabling Buttons and Showing Correct Answer (continued in SelectAnswer function)
- The loop (Array.from(answerButton.children).forEach(button => { … })) iterates through all the answer buttons using forEach.
- Inside the loop, it checks if the current button (button) has the data-correct attribute set to “true”. This identifies the button representing the correct answer.
If it’s the correct answer: - The “correct” class is added to the button using classList.add(“correct”), likely applying the green background color from the CSS.
- Regardless of whether it’s the correct answer or not, the button is disabled using button.disabled = true. This prevents users from selecting the same answer again.
Showing the “Next” Button (continued in SelectAnswer function)
- Finally, the display style of the “Next” button is set to “block”, making it visible after an answer is selected.
Showing the Score (showScore function)
- The showScore function is called to display the user’s score after all questions are answered.
- It calls the restState function to clear any answer button styles.
- It updates the text content of the questionElement to display a message like “You Scored ${Score} Out of ${questions.length}”.
- restState function changes the text of the “Next” button to “Play Again”.
- It sets the display style of the “Next” button to “block” to make it visible.
Handling the “Next” Button Click (handleNextButton function)
- The handleNextButton function is likely called when the user clicks the “Next” button.
- It increments the currectQuestionIndex by 1 to move to the next question in the array.
- It checks if currectQuestionIndex is still within the bounds of the question’s array length.
- If there are more questions (currectQuestionIndex < questions.length), it calls the showQuestion function to display the next question.
- If there are no more questions (currectQuestionIndex reaches the array length), it calls the showScore function to display the final score.
Event Listener for “Next” Button Click
- An event listener is added to the “Next” button (nextButton). When the button is clicked, it calls an anonymous function.
- Inside the anonymous function, it checks the value of currectQuestionIndex.
- If there are more questions (currectQuestionIndex < questions.length), it calls the handleNextButton function to handle moving to the next question.
- If there are no more questions, it calls the startQuiz function to restart the quiz.
Starting the Quiz (startQuiz called at the end)
- Finally, the code calls the startQuiz function at the very end. This ensures the quiz starts as soon as the JavaScript code is loaded and executed.
Overall, this JavaScript code effectively manages the quiz flow by:
- Setting up the initial state and questions data.
- Displaying the current question and answer choices.
- Handling user selection of answers, including feedback and disabling buttons.
- Showing the final score after all questions are answered.
- Restarting the quiz when the “Play Again” button is clicked.