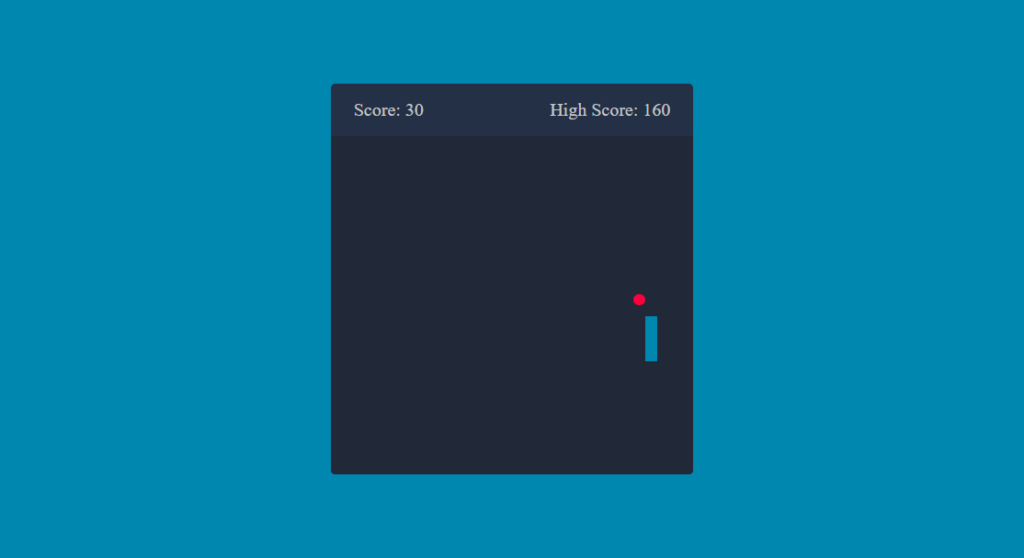
JavaScript snake game tutorial: Build a simple, interactive game
JavaScript snake game tutorial: Build a simple, interactive game.
- Use HTML to Structure the snake game.
- Use CSS to Style the layout of the snake game.
- Javascript is used to add the functionalities of the snake game.
Source code off HTML file
<!DOCTYPE html>
<html lang="en">
<head>
    <meta charset="UTF-8">
    <meta name="viewport" content="width=device-width, initial-scale=1.0">
    <title>Snake Game</title>
    <link rel="stylesheet" href="style.css">
    <script src="script.js" defer></script>
</head>
<body>
    <div class="container">
        <div class="wrapper">
            <div class="game-details">
                <span class="score"> Score: 0</span>
                <span class="high-score">High Score: 0</span>
            </div>
            <div class="play-board"></div>
        </div>
    </div>
</body>
</html>
Explanation
Body section:
- <body>: This section contains the content displayed on the webpage.
- <div class=”container”>: This div element is the container for the entire game. It likely has styles applied in the style.css file to position and size the game elements.
- <div class=”wrapper”>: This div element likely acts as a wrapper for the game details and the play area. It might also have styles in the CSS file.
- <div class=”game-details”>: This div contains details about the game.
- <span class=”score”> Score: 0</span>: This span element displays the current score of the game. It starts at 0.
- <span class=”high-score”> High Score: 0</span>: This span element displays the highest score achieved so far. It also starts at 0.
- <div class=”play-board”></div>: This div element represents the playable area of the game where the snake will move and the food will appear. It’s currently empty but will likely be populated with content using JavaScript (included in script.js).
source code of CSS file
*{
    margin: 0;
    padding: 0;
    box-sizing: border-box;
}
body{
    overflow: hidden;
}
.container{
    width: 100%;
    height: 100vh;
    background: #0087b0;
    display: flex;
    justify-content: center;
    align-items: center;

}
.wrapper{
    width: 65vmin;
    height: 70vmin;
    display: flex;
    flex-direction: column;
    background: #233046;
    border-radius: 5px;
    overflow: hidden;
}
.game-details{
    color: #c6c6c6;
    font-size: 20px;
    font-weight: 500;
    padding: 17px 25px;
    display: flex;
    justify-content: space-between;
}
.play-board{
    width: 100%;
    height: 100%;
    background: #212837;
    display: grid;
    grid-template: repeat(30 , 1fr) / repeat(30 , 1fr);
}
.play-board .food{
    background: #ff003d;
    border-radius: 50%;
}
.play-board .snake{
    background: #0087b0;
}
Explanation
This code isn’t just boring lines, it’s the secret recipe for building the snake game’s world! consider the code as a chef’s commands, guiding us to create a delicious visible experience. let’s break it down step-by-step:
The Clean Kitchen (Global Tweaks):
- *{ margin: 0; padding: 0; box-sizing: border-box; }: this is like prepping the kitchen. We clean out any leftover substances (margins and padding) from preceding dishes (websites). We also set the “box-sizing” to “border-box” which ensures ingredients (elements) only take up the space they need, not including any extra wrapping (padding).
The Big Blue Pan (body):
- body{ overflow: hidden; }: This is like setting a giant blue pan (the background) as the base for our game. The overflow: hidden part makes sure no ingredients (content) spill over the edges of the pan, keeping everything contained.
The Snake’s Playhouse (container): - width: 100%; height: 100vh; background: #0087b0;: This creates the main playing area – a giant blue rectangle that takes up the entire oven (viewport). Imagine it as a playhouse where the snake will live and slither around.
- display: flex; justify-content: center; align-items: center;: This is like setting up a special stand in the oven (using display: flex) to hold the playhouse. The justify-content: center and align-items: center components make sure the playhouse is placed perfectly inside the center of the oven, like a delicious cake in the middle of a baking dish.
The Snake’s Den (wrapper):
- width: 65vmin; height: 70vmin; background: #233046; border-radius: 5px; overflow: hidden;: Inside the blue playhouse, we build a smaller, darker den (another rectangle) for the snake. It has slightly rounded corners (border-radius: 5px) to make it look cozy. The overflow: hidden part ensures nothing spills out of the den.
The Scoreboard (game-details): - color: #c6c6c6; font-size: 20px; font-weight: 500; padding: 17px 25px; display: flex; justify-content: space-between;: In a corner of the den, we create a small scoreboard. It uses a light gray color (color: #c6c6c6) to whisper the score and high score, like a secret message for the player. The display: flex; justify-content: space-between; parts make sure the score and high score are displayed neatly on opposite sides.
The Checkered Dance Floor (play-board):
- width: 100%; height: 100%; background: #212837; display: grid; grid-template: repeat(30 , 1fr) / repeat(30 , 1fr);: This transforms the snake’s den into a giant checkered dance floor! The background color is a darker shade for contrast. Using display: grid, we create a grid of 30 rows and 30 columns with equal-sized squares (1fr). Now the snake has a perfect space to move and groove!
The Delicious Treat (play-board .food – not shown, but you can imagine it): - This code style (likely) defines the food as a bright red dot (background: #ff003d; border-radius: 50%;) on one of the squares. It’s like the cherry on top of the cake – a yummy treat waiting for the snake to gobble up!
The Snake’s Shiny Scales (play-board .snake – not shown, but you can imagine it): - This code style (likely) defines the snake as having a blue color (background: #0087b0;) similar to the playhouse. But imagine the snake with a slight shine, so you can see it slither around the checkered dance floor!
Source code of JavaScript file.
const playBoard = document.querySelector(".play-board");
const scoreElement = document.querySelector(".score");
const highScoreElement = document.querySelector(".high-score");
let gaveOver = false;
let foodX, foodY;
let snakeX = 13 , snakeY = 10;
let snakeBody = [];
let vercityX = 0 , vercityY = 0;
let setIntervalId;
let score = 0;
let highScore = localStorage.getItem("high-score") || 0;
highScoreElement.innerText=`High Score: ${highScore}`;
const changeFoodPostion = () =>{
    foodX = Math.floor(Math.random() * 30) +1 ;
    foodY = Math.floor(Math.random() * 30) +1 ;
}
const handleGameOver = () =>{
    clearInterval(setIntervalId);
    alert("Gave over! Press ok to replay");
    location.reload();
}
const changeDirection = (e) =>{
    if(e.key === "ArrowUp" && vercityY != 1){
        vercityX = 0;
        vercityY = -1;
    } else if(e.key === "ArrowDown" && vercityY != -1){
        vercityX = 0;
        vercityY = 1;
    } else if(e.key === "ArrowLeft" && vercityX != 1){
        vercityX = -1;
        vercityY = 0;
    } else if(e.key === "ArrowRight" && vercityX != -1){
        vercityX = 1;
        vercityY = 0;
    }
}
const initGame = () => {
    if(gaveOver) return handleGameOver();
    let htmlMarkup = `<div class="food" style="grid-area : ${foodY} / ${foodX}"></div>`;

    if(snakeX === foodX && snakeY === foodY){
        changeFoodPostion();
        snakeBody.push([foodX , foodY]);
        score += 10;
        highScore = score >= highScore ? score: highScore;
        localStorage.setItem("high-score" , highScore);
        scoreElement.innerText=`Score: ${score}`;
        highScoreElement.innerText=`High Score: ${highScore}`;
    }
    for (let  i= snakeBody.length - 1;  i >0; i--){
        snakeBody[i] = snakeBody[i -1];
    }
    snakeBody[0] = [snakeX , snakeY];
    snakeX += vercityX;
    snakeY += vercityY;
    if(snakeX <= 0 || snakeX > 30 || snakeY <= 0 || snakeY > 30){
        gaveOver = true;
    }
    for (let i = 0; i < snakeBody.length; i++){
        htmlMarkup += `<div class="snake" style="grid-area : ${snakeBody[i][1]} / ${snakeBody[i][0]}"></div>`;
        if(i !== 0 && snakeBody[0][1] === snakeBody[i][1] && snakeBody[0][0] === snakeBody[i][0]){
            gaveOver = true;
        }
    }
    playBoard.innerHTML = htmlMarkup;
}
changeFoodPostion();
setIntervalId = setInterval(initGame , 150);
document.addEventListener("keydown" , changeDirection);
Explanation
Imagine this code as the brain of our snake game, the chief chef controlling everything! Here’s a breakdown of its recipe:
Ingredients:
- It grabs references to the play area (playBoard), score holder (scoreElement), and high score holder (highScoreElement) from our web page, like finding the right pots and pans.
- It sets up variables to keep track of things:
- gaveover (a switch to check if the game is over, like a burnt pizza!),
- foodX & foodY (to store the secret location of the red dot),
- snakeX & snakeY (the snake’s current position),
- snakeBody (an array to remember where each part of the snake is slithering!),
- vercityX & vercityY (to control the direction the snake will slither – up, down, left, or right!),
- setIntervalId (a timer to keep the game moving!),
- score (how many red dots the snake has eaten!), and
- highScore (the record number of flies eaten!).
Setting Up the Game (like preheating the oven):
- It checks if the game is over. If so, it shows an alert and restarts (like taking out a burnt pizza and starting over).
It places a red dot (the food) in a random spot in the play area.
Let’s Eat! (The main loop): - This part keeps repeating (like checking on your cake!).
- It checks if the snake ate the red dot. If so, it places a new dot, makes the snake longer (it ate!), increases the score, and updates the high score if needed.
- It remembers where each part of the snake’s body is and updates it (like the snake slithering). The head moves first, and then the rest follows.
- It updates the snake’s position based on the chosen direction (up, down, left, right).
- It checks if the snake hit the wall (going out of bounds) or ate itself (ouch!). If so, gaveOver is set to true.
- It builds a picture of the game with the snake and the fly and puts it in the play area.
- Control the Snake (like using the oven mitts):
- This part listens for your key presses (like using the oven mitts!).
- When you press an arrow key, it changes the snake’s direction (up, down, left, right) as long as it’s not trying to go backward and bump into itself.
The Final Result:
- This code keeps running the loop, making the snake slither, checking for dots, and keeping track of the score. It’s the brain that brings the game to life!